UV-Vis Spectroscopy Troubleshooting

UV-Vis spectroscopy (or optical spectroscopy) is a technique for sample characterization. It is a powerful method for analyzing material properties, allowing scientists to study a material's molecular properties, structure, and behavior. UV-Vis spectroscopy can also be used to monitor reactions, identify materials for certain purposes and to investigate the molecular structure.
Most spectrometers, like the Ossila Spectrofluorometer and USB Spectrometer, are easy-to-use and there are many instructional guides on how to perform UV-Vis spectroscopy. However, it can be incredibly frustrating if you encounter a problem while performing UV-Vis spectroscopy, and usually causes an unnecessary delay. Knowing how to troubleshoot UV-Vis spectroscopy can help you save time and ensure successful results.
Problems in UV-VIS Spectroscopy
The problems you are most likely to encounter can be divided into three categories:
- Sample problems
- Instrument problems
- Issues with methodology or setup
Sample problems occur when your sample is not of sufficient quality or purity, leading to inaccurate measurements. Methodological problems, on the other hand, occur when there is an issue with your experimental procedure which results in incomplete results or inaccurate data.
To troubleshoot any of these problems, start by checking the quality and purity of your sample, as this is the most common issue. If the sample is of sufficient quality and purity, then the issue is likely related to the instrument or methodology. For instrument problems, you should check the instrument and ensure it is functioning properly. If the issue is related to methodology, review your procedure and check your instrument setup.
Sample Preparation
The first thing to check is that your sample and sample holder (cuvette holder or substrate/transmission holder) are adequate and suitable for the measurement and that the equipment is clean. Some questions to consider are listed below:
Are your substrates or cuvettes clean?
Unclean cuvettes could lead to unexpected peaks in your spectrum. Likewise, if you are measuring the optical properties of thin films, dirty substrates can lead to pinholes or defects in your films which can inhibit the quality of your spectra. Thoroughly wash and substrates/cuvettes before measurement and only handle cuvettes or substrates with gloved hands to avoid fingerprints.
Is your sample contaminated?
If you are finding unexpected peaks in your spectra, check that your sample or cuvette has not been contaminated at any time. Contamination can be introduced at any stage during sample preparation: when cleaning substrates/cuvettes, when decanting materials or when dissolving or depositing your sample.
Are you using the right cuvette or substrate?
Ensure you are using the right cuvette or substrate for your measurements. You should generally use quartz glass cuvettes or substrates for optical measurements due to their high levels of transmission in the visible and UV light region. You can also use disposable cuvettes if you are measuring a lot of samples. However you must ensure that you only use this for samples with compatible solvents. Disposable cuvettes are typically made of plastic and some solvents will dissolve these, which could cause a nasty accident. For the most versatile cuvettes, its best to use a reusable quartz cuvette with the appropriate path length.
Is your sample within the beam path?
In order to measure optical properties of your samples accurately, you must ensure the excitation beam passes through your sample only. For solution measurements, you will need to ensure there is enough volume in the cuvette so that the excitation beam can pass through the sample. If you only have a small amount of solution, or you want to avoid material waste, you can again use a cuvette with a smaller path length. Alternatively, if you are measuring a film, you should ensure that you have adequate substrate coverage. Also make sure that the light passes through a uniform area of your sample.

Measurement Conditions
Before taking an optical spectroscopy measurement, you should allow the spectroscopy light source to warm up for the appropriate amount of time. Any variation in the irradiance or spectrum of a light source can affect optical measurements. This is especially important if you are comparing multiple samples. If you are using a tungsten halogen or arc lamps, you should wait 20 minutes or so after turning the lamp on before measuring. LED light sources or lasers should take a few minutes to achieve consistent output.
Other sample factors that can influence UV-Vis spectroscopy measurements are:
- Sample temperature
- Sample concentration
- Sample pH
- Effect of solvents
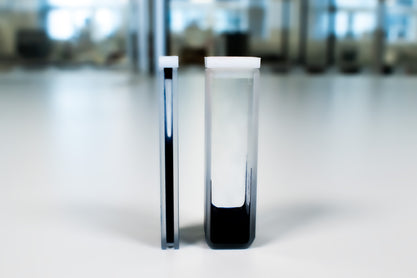
If you have low transmission or absorbance rates through your sample, the concentration of sample may be too high. If you reduce the concentration of a solution, you can increase your measured signal. This is because more concentrated samples may scatter light more intensely, meaning less light can be detected by your spectrometer. You should also be aware that if you are measuring absorbance or photoluminescence over an extended period, solvent in the sample may be evaporating, causing the concentration to change.
If you cannot reduce the concentration of your sample without affecting your results, you could use a cuvette with thinner path length. This reduces the amount of sample the light has to travel through, reducing the probability of light scattering before it escapes your sample.

In solution measurement, changing sample temperature can affect rate of reaction, solute solubility or change concentration of your sample. You can also see a change in thin films at high temperatures. You should ensure that the temperature of your samples remains consistent between measurements.
Setup and Alignment
Spectrophotometer and Spectrofluorometer
If you are using a dedicated spectrophotometer rather than a modular system, the enclosed sample chamber handles much of the alignment for you. Sample chambers are designed to ensure repeatable positioning of your sample, maintaining consistency between experiments and improving the reliability of your results. Even so, you should ensure cuvettes and substrates are fully seated in the holder and that the beam path is not obstructed.
Modular Spectrometers
When using a modular spectrometer, you should make sure that all components are aligned to maximize signal. Alternatively, you can use optical fibers between components to control the light path.
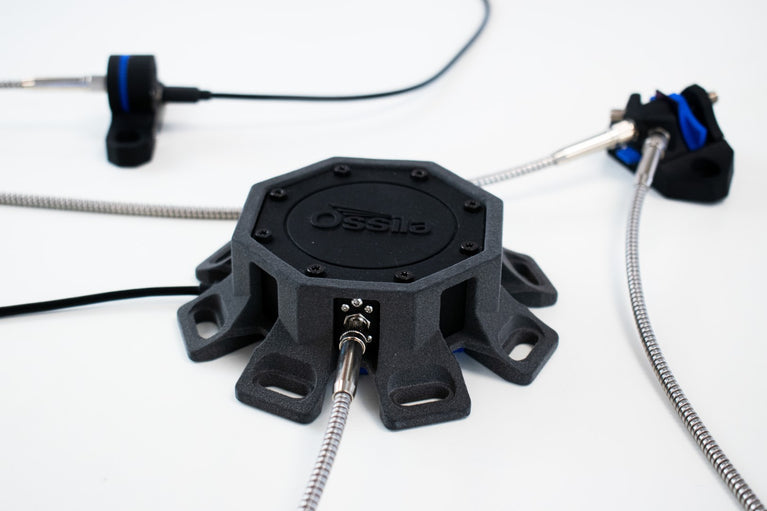
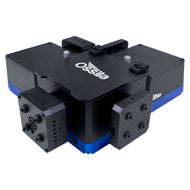
If you are measuring thin films, you should make sure that your sample is placed perpendicular to your light source and spectrometer. The Ossila spectroscopy transmission holder can help you position your sample at a 90° orientation, and optical fibers can be fixed to either side creating an optimized optical pathway. Alternatively, you can fix modular component to the optical breadboard to align components more easily.


If you are not using optical fibers:
- Make sure that your sample remains at orientated towards the spectrometer.
- Between measurements, keep positioning of modular elements the same.
- Ensure there is a clear uninterrupted path between the light source and the spectrometer.
If you are using optical fibers between modular elements:
- Use optical fibers to guide light between modular elements.
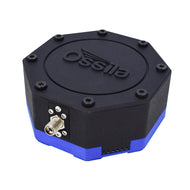
- Make sure these have compatible connectors to ensure tight seal between modular component and cable. The Ossila USB Spectrometer uses SMA connectors.
- If your signal is low when using optical fibers, you may need to replace them. Check the attenuation of your cable at the wavelength you are measuring. If this is particularly low, this may be inappropriate for low level signals such as absorbance.
- If signal transmission is low, your cable might be damaged. Optical fibers can experience many forms of damage (bending or twisting damage, degradation of the protective layer leading to light leakage, etc.)
- If you need to replace the optical fibers between components, ensure the replacement is the same length as the original cable.
- If you are measuring fluorescence on thin films and you are using a modular set-up, where you position incoming and outgoing relative to your sample can significantly affect the measurement. You need to position the optical fibers correctly to remove the excitation source signal as much as possible.
Spectroscopy Equipment


Learn More
 Sources of Error in UV-Vis Spectroscopy
UV-Vis spectroscopy is a powerful analytical tool used in many fields to investigate and observe changes in material properties. However, like any analytical technique, all spectrometers - including the Ossila USB Spectrometer - are subject to error under certain conditions.
Read more... Measuring Thin Film Fluorescence
Measuring fluorescence (or photoluminescence) with the Ossila Optical Spectrometer will allow you to detect light emission from your sample between 360 nm - 1000 nm. You can use optical spectroscopy as a quick and easy way to characterize fluorescence from your sample. However, you will need an integrating sphere or a more complex system if you want to measure quantitative measurements such as PLQY.
Read more...