How To Set Up and Use The Ossila Syringe Pump
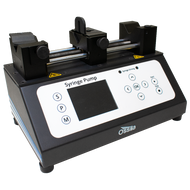
With no external dependencies, both the Ossila Single Syringe Pump and Ossila Dual Syringe Pump are quick and easy to set up and use. Both models have similar internal circuitry, in-built software, and controls. The dual pump model allows for each pump to be programmed independently of the other. In practice, this means that using and programming a dual syringe pump is no more complicated than using and programming two single syringe pumps. No external controls are required in order to operate either unit.

Getting Started
Begin by placing the syringe pump on a flat and solid surface away from vibrations and hazardous materials. To ensure efficient use, avoid placing the system in extreme temperatures.
Check that the unit is switched off, then connect the power supply to the mains outlet. Plug the power cable into the unit and turn the syringe pump on. When booted, the LCD display will show the 'setting mode' screen. This is also accessible by pressing 'S'.
From the 'setting mode' screen, you can set the force and select the diameter of syringe that you are going to use. The most common syringe sizes (1 ml, 2 ml, 5 ml, 10 ml, and 50 ml) are pre-set, but you can also enter a custom diameter. To protect glass syringes from potential damage, you can also set the maximum force that you want the syringe pump to use.
What limits the maximum force that can be used?
The maximum applicable force can be varied in the system as an additional safety feature. At its maximum, the pump can apply over 500 N of linear force to the syringe. For a 50ml syringe, this equates to a pressure of 4.37 bar on the piston and for a 5ml syringe, this becomes as high as 47 bar.
Most syringes are only rated up to a certain maximum pressure. For plastic syringes, this is generally 10 bar. Glass syringes can be rated as low as 1.5 bar or as high as 30 bar depending upon the brand. Setting maximum limitations within the software based upon the syringe manufacturers recommendations protects your syringes against damage.
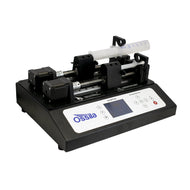
Pressing the manual button ('M') will switch the syringe pump to manual mode. Manual mode allows you to move the plunger forwards and backwards by pressing the forwards and backwards buttons on the front panel of the unit. This is particularly useful when removing or attaching a syringe.
How to Attach a Syringe to the Syringe Pump
Attaching a syringe to either model of syringe pump is straight-forward. Follow these steps in order:
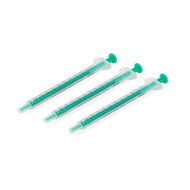
- Pre-load the syringe with your solution. Make sure that there are no air bubbles before proceeding.
- Place the barrel of the syringe into the groove of the syringe holder, with the barrel top inside the clamping mechanism. You can then lower the clamping arm onto the top of the syringe and lock it into place by tightening the wing nut.
- Enter manual mode on the syringe and drive the plunger holder until the rests against the end of the plunger. Once in place, tighten the clamping mechanism around the plunger. This should be parallel with the barrel of the syringe.
- Connect any additional tubing or fixtures required for your experiment, using manual mode to preload the fixtures and tubing with your solution.
The product manual provides more information.
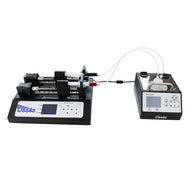
Controlling Your Syringe Pump
Pressing the program button ('P') will allow you to set up a routine or run a pre-saved program. Solution dispense volume, rate and time, can be controlled at each step. When you are satisfied with your program, press 'OK' to save it to the internal memory. The software can save and store up to 20 different programs, each with a total of 100 individual steps. This allows for the programming of complex processes, such as sequential deposition of multi-layered structures. Each step allows the user to select a dispense rate, a dispense time, and/or a dispense volume.
To run a sequence, press 'START' and the pump will operate automatically.

Contributing Authors
Written by
Product Developer
Application Scientist